
Cisco ISE 3.5 ZTP on standalone ESXi: a configuration file and one VM setting
Cisco’s native Zero Touch Provisioning (ZTP) provides a straightforward way to do that on standalone ESXi. Prepare a text file, encode it with Base64, and place the result in the VM’s guestinfo.ise.ztp advanced configuration parameter. The appliance reads those settings during setup.
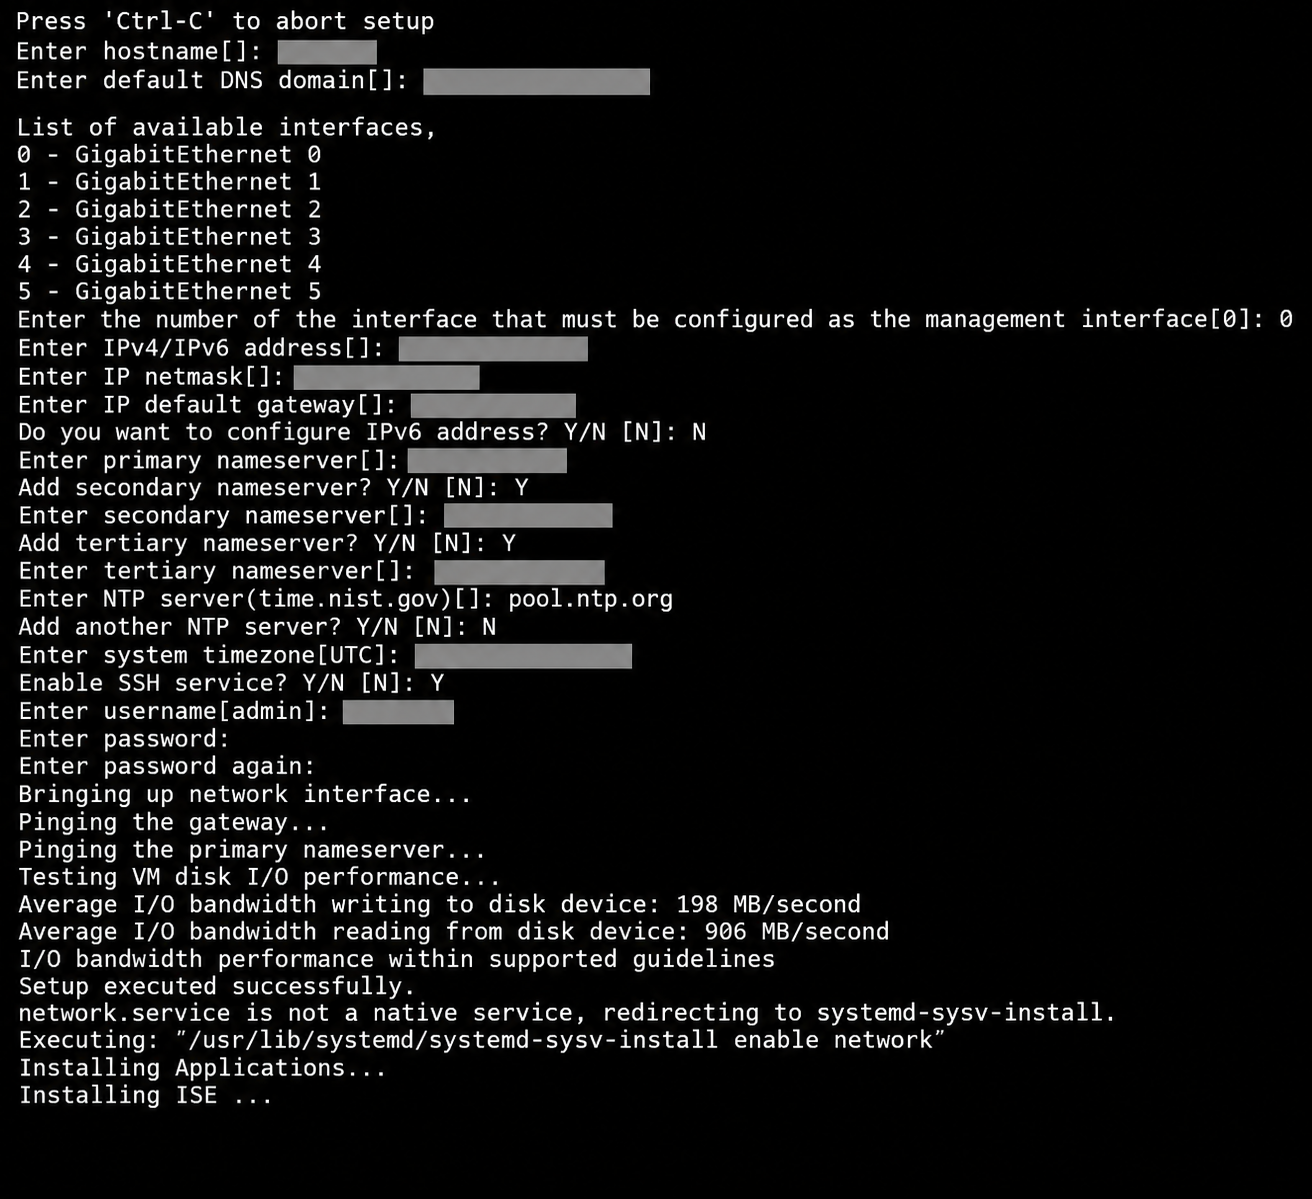
My first attempt visibly consumed the values from that file. Seeing the console populate the hostname, network settings, DNS, and timezone was convenient. It also made the limits clear: an automated answer still has to be correct, and the network services behind that answer still have to work.
What this workflow covers
This walkthrough uses the VM-user-data method in Cisco’s ISE 3.5 installation guide. The tools are an ESXi Host Client browser session, a plain-text editor, and a local Base64 encoder. It does not require vCenter or a custom automation service.
The configuration below handles the initial appliance setup. It does not join Active Directory, apply a patch, or restore a configuration backup. Those remain separate steps in this workflow.
Before importing an OVA, check the supported hypervisor, deployment profile, reservations, disk capacity, network mapping, DNS, NTP, and licensing. Select disk size for the intended persona: Cisco’s production standalone/PAN/MnT guidance calls for at least 600 GB. The existence of a 300 GB OVA is not a sizing recommendation for all roles. See Cisco’s disk requirements.
For a replacement, keep the native backup, encryption key, certificate/private-key exports, CA recovery material, and source installation media safely off the host. Plan the outage before reclaiming storage from an existing VM.
Prepare the configuration
Create a plain-text file named ise-ztp.conf. In macOS TextEdit, use Format → Make Plain Text and preserve the .conf extension. Avoid smart quotes.
Here is a sanitized example. Replace every environment value before using it:
hostname=ise
ipv4_addr=192.0.2.20
ipv4_mask=255.255.255.0
ipv4_default_gw=192.0.2.1
domain=example.invalid
primary_nameserver=192.0.2.53
secondary_nameserver=192.0.2.54
tertiary_nameserver=192.0.2.55
primary_ntpserver=time.nist.gov
timezone=America/New_York
ssh=true
username=admin
password=<REPLACE_WITH_YOUR_BOOTSTRAP_PASSWORD>
Secondary and tertiary DNS entries are optional. Their on-premises names include underscores; do not mix them with similarly named cloud deployment fields. Cisco’s ZTP configuration examples provide the supplementary key/value syntax.
Use an NTP source reachable from the ISE network. The public server shown here is a choice to validate, not a requirement. Replace the entire password placeholder locally and keep the resulting file out of Git.
For a migration, check the source hostname’s exact capitalization before filling in this file. That detail became significant during my restore attempt.
Encode the file locally
On a Mac, this command encodes the file, removes line breaks from the encoded output, and places it on the clipboard:
base64 -i "/absolute/path/to/ise-ztp.conf" | tr -d '\r\n' | pbcopyUse the actual path to your file. Repeat the command after every edit.
Base64 is reversible encoding. The clipboard value contains the bootstrap password, so handle it as a secret. Use a local encoder rather than a public website, and keep both the original file and encoded value out of screenshots, blog posts, and Git.
Add the VM setting before first boot
Import the approved ISE OVA through the ESXi Host Client and disable automatic power-on. With the VM powered off:
-
- Verify the deployment profile, CPU and memory reservations, disk placement, and network mappings. Review the connect state of each NIC.
-
- Open Edit settings → VM Options → Advanced → Edit Configuration. The interface may group the option under Configuration Parameters.
-
- Add
guestinfo.ise.ztpand paste the Base64 string as its value.
- Add
-
- Save the settings and configure serial-console monitoring according to Cisco’s installation procedure.
-
- If reusing the old node’s address, ensure that node is off before powering on the replacement.
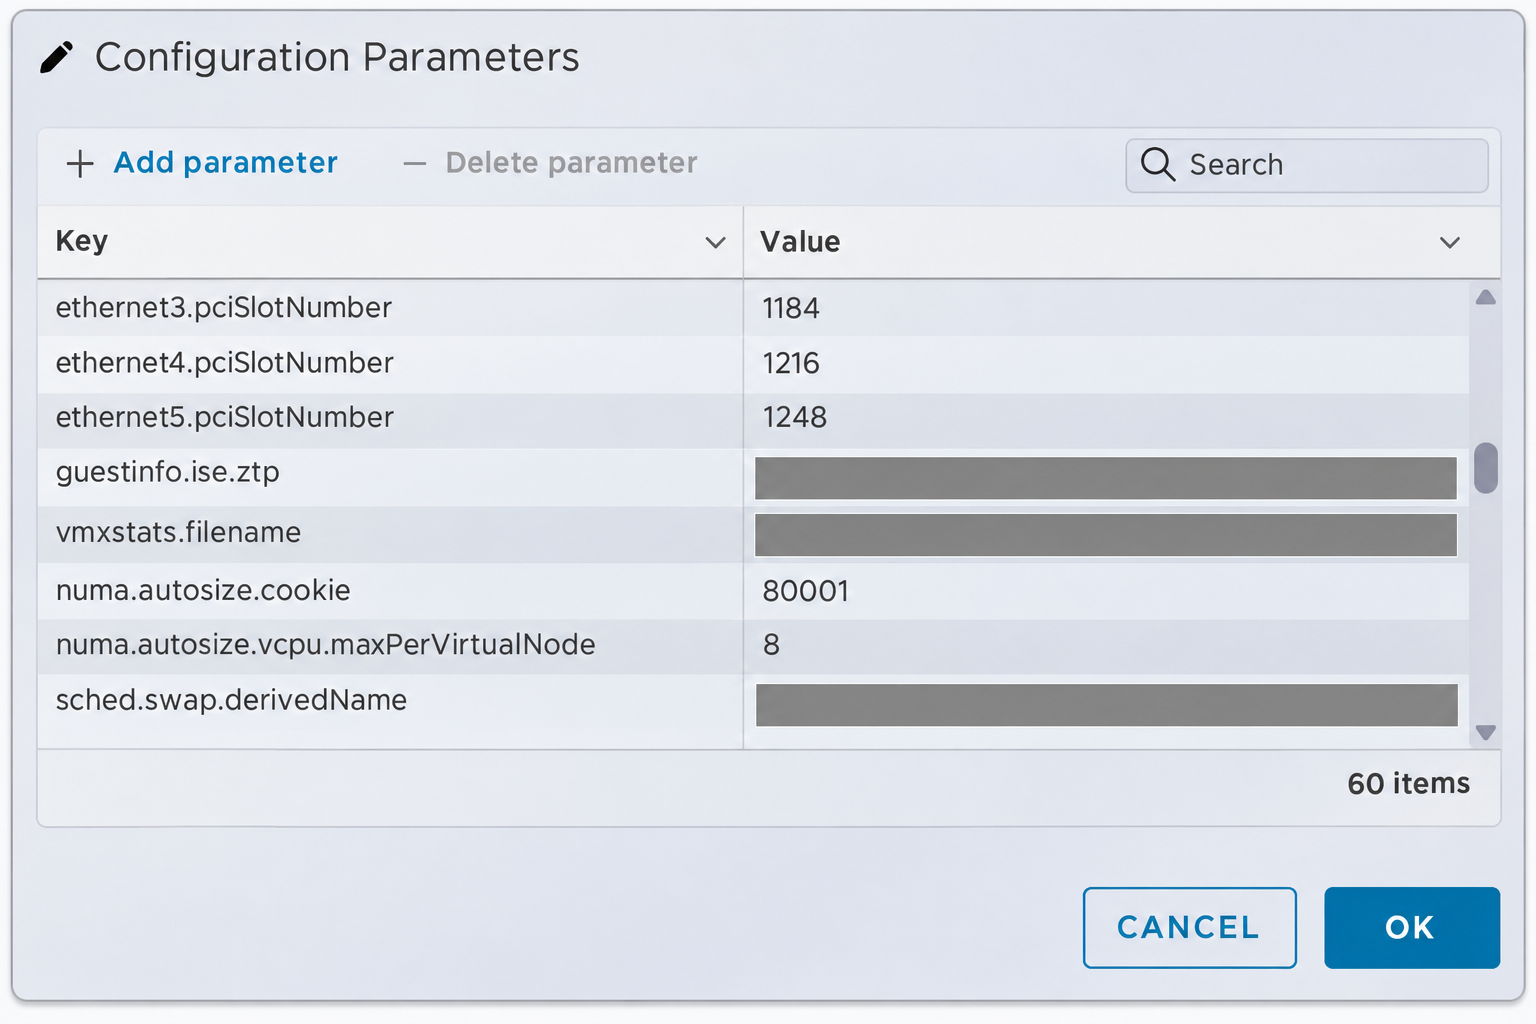
The parameter contains the file’s contents, not a path. ESXi does not need access to the original file, and this method does not require a separate ZTP image.
A restore lesson: hostname capitalization
A later restore attempt rejected the backup because the source and destination hostnames differed only in capitalization. The bootstrap configuration had used lowercase where the existing backup retained uppercase characters.
A case-only CLI rename changed the running configuration, but the GUI continued to show the lowercase identity and the restore still failed. That is the observed result; I do not yet have a validated recovery procedure to present here.
For a new identity, Cisco recommends lowercase hostnames. For an existing backup, do not casually normalize its identity during migration. Verify the expected name in both the CLI and the Deployment page before attempting restoration. A successful CLI command is not sufficient evidence that the application identity changed. Hostname changes also affect services, certificates, and AD joins; consult Cisco’s hostname command documentation.
A clean replacement using the original capitalization is being considered. It remains a proposed next step, not a proven fix. Editing the backup archive to bypass the check is not part of this workflow.
What remains after bootstrap
The planned migration sequence is:
-
- Verify appliance services, identity, network settings, and time synchronization.
-
- Complete the initial GUI password change.
-
- Apply the reviewed patch for ISE 3.5 and verify completion.
-
- Restore the supported native configuration backup.
-
- Recover certificates/private keys and internal CA material as applicable.
-
- Rejoin Active Directory after restoration, then validate licensing, integrations, and representative successful and denied authentications.
Cisco documents patching the newly installed release before restoration in its upgrade procedure. The AD join belongs after restoration because restore can disconnect the node from its existing domain join. See Cisco’s AD integration guidance.
One download detail also mattered during preparation: the original patch was a .tar.gz, while the first local copy was a decompressed .tar. Their checksums were different. Retaining the original .tar.gz produced a match to the supplied checksum. Check whether your browser automatically opens downloaded archives before assuming a repeated download is corrupt.
Current outcome
The useful result so far is that native ZTP consumed the configuration and removed the repetitive setup entry.
The companion repository contains a sanitized example, the manual procedure, and validation notes: Cisco ISE ZTP project.